How To Change Font In Cricut Design Space App
This post contains affiliate links. If you use these links to buy something, we may earn a commission, but it doesn't cost you anything. Thanks!
Learning how to edit text in Cricut Design Space is really easy!
There are all sorts of text options available in Cricut Design Space. Once you know what's there, I'm sure a whole new range of project ideas will flood into your head.
How To Edit Text In Cricut Design Space
I'll go through all the different ways you can edit text with Cricut but working through all the text related icons on the Design Space Canvas.
How To Add Text In Cricut Design Space
To create a new text box, click the text symbol on the left hand side. Once you have written some text you can edit it with the box around it. You can:
- Delete it
- Rotate it
- Unlock it to change the proportions of the text – when the text is locked the height and width will always stay in proportion. Unlock it to alter the height or width of the text.
- Increase or decrease the size of the text by dragging it in or out
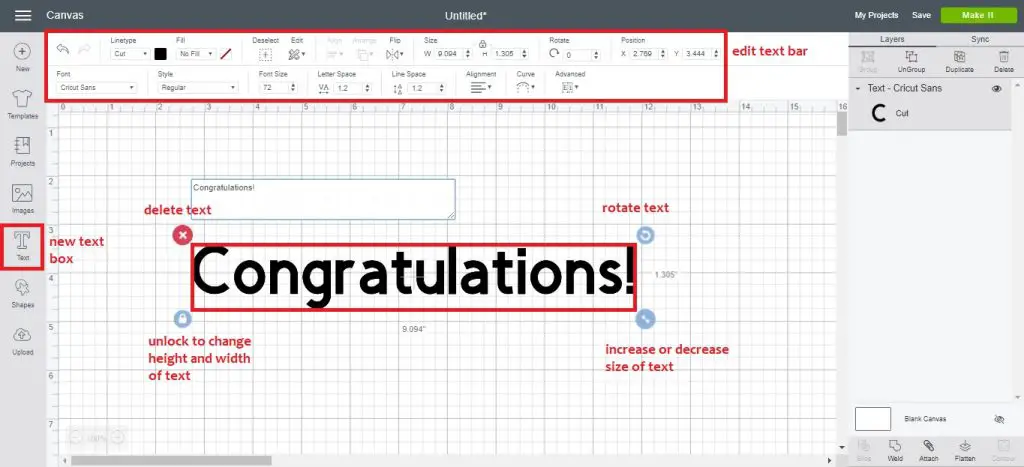
The text edit bar is at the top.
With the icons along the bottom row, from left to right, you can:
- Change the font
- Change the style – regular, bold, italic, bold italic, or writing style
- Change the font size
- Change the letter spacing
- Change the line spacing
- Change the alignment of the text – left, center or right
- Curve text upwards or downwards
- Advanced features – ungroup to letters, lines or layers
With the icons along the top row, from left to right, you can:
- Undo or redo an action
- Linetype – cut, draw or score
- Change pen type and color for drawing
- Change the fill to color or pattern
- Deselect text
- Copy and paste text
- Align and center multiple lines of text together
- Distribute text horizontally or vertically
- Change the order of your layers – send a text layer to the back or bring it to the front
- Flip text horizontally or vertically
- Change width and height of text – if text is locked, height and width will automatically change to stay in proportion, if it is unlocked they will not
- Rotate the angle of the text
- Change the position of the text on the canvas
Choose Font On Cricut
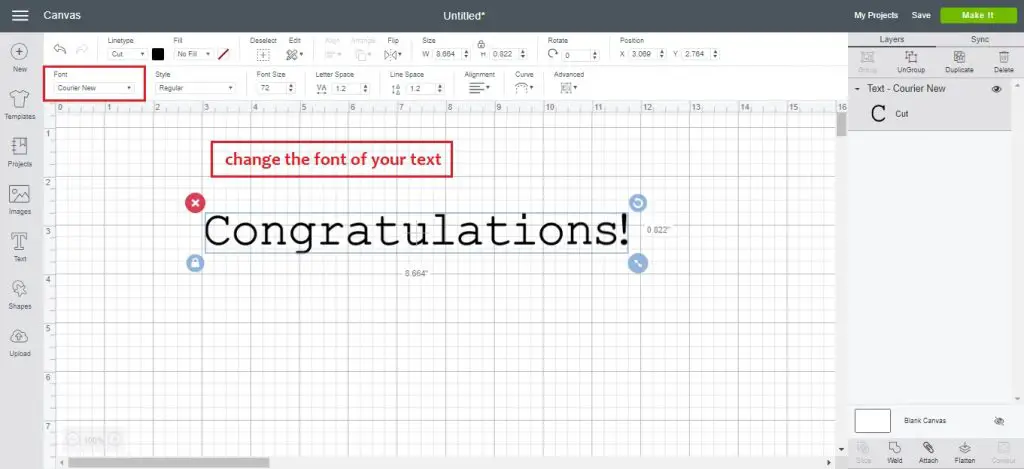
You can change the font of your text by choosing the Cricut fonts available for purchase, or your system fonts, which are the ones you have previously downloaded to your computer.
Filter fonts by multi-layer, single-layer or writing. Learn how to download and install free fonts to your computer for use in Design Space.
Changing The Font Style
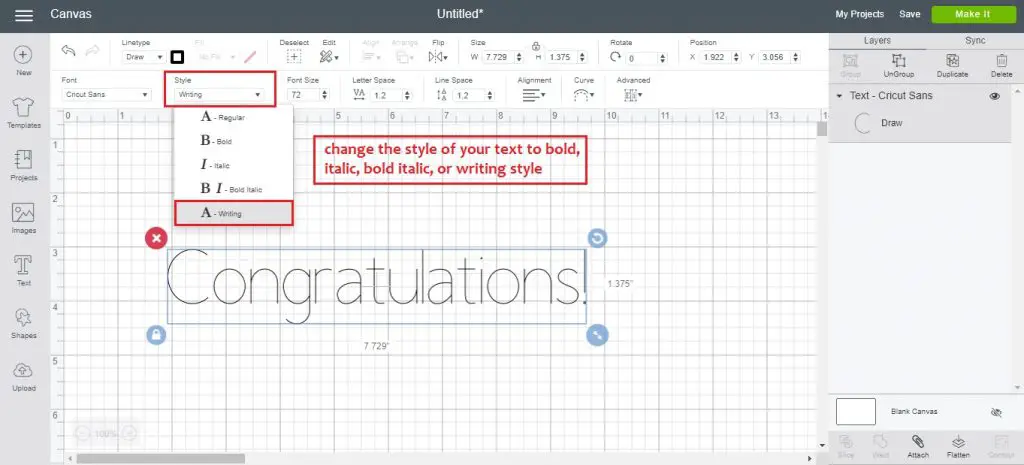
You can change the style of your text to regular, bold, italic, bold italic, or writing style.
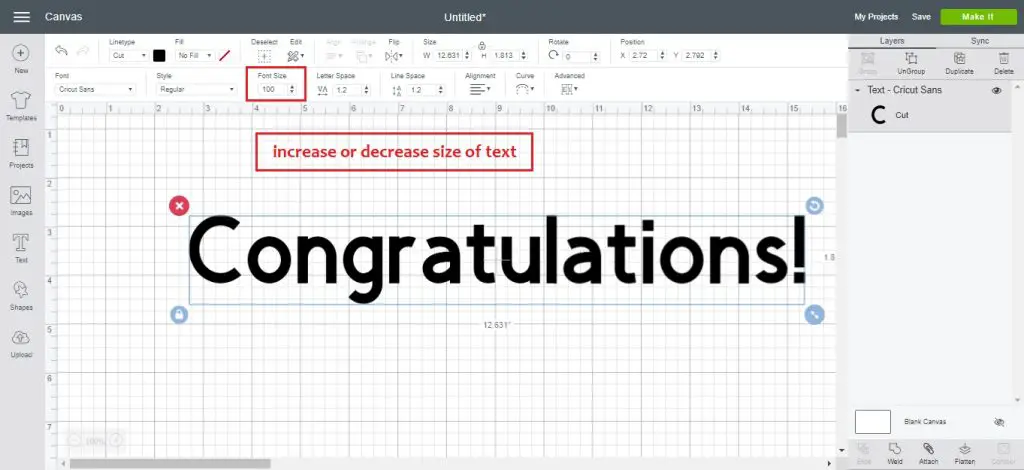
Changing The Font Size
You can change the font size. Type in a number, or click the arrows up or down, to increase or decrease the size of your text.
Changing The Letter Spacing
You can change the letter spacing of your text. Click the arrows up or down to increase or decreasing the space between the letters.

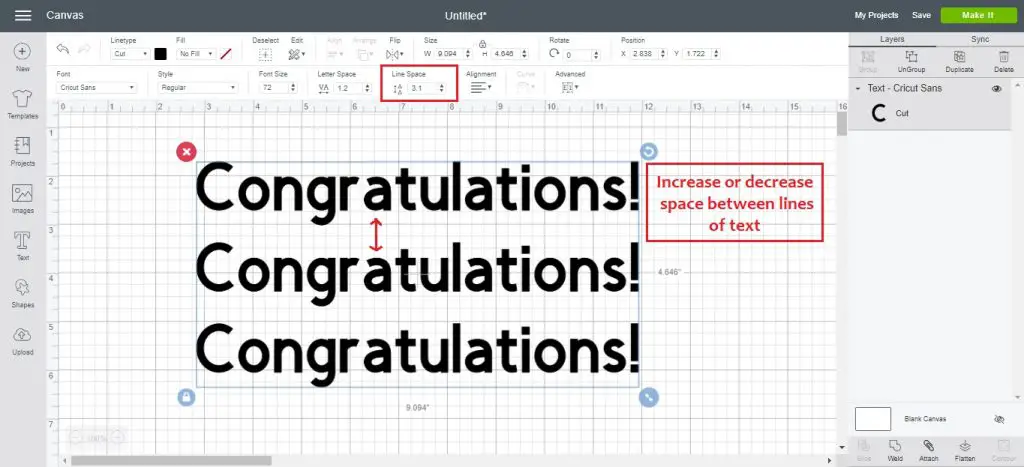
Changing The Line Spacing
You can change the line spacing. Click the arrows up or down to increase or decrease the spacing between lines of text.
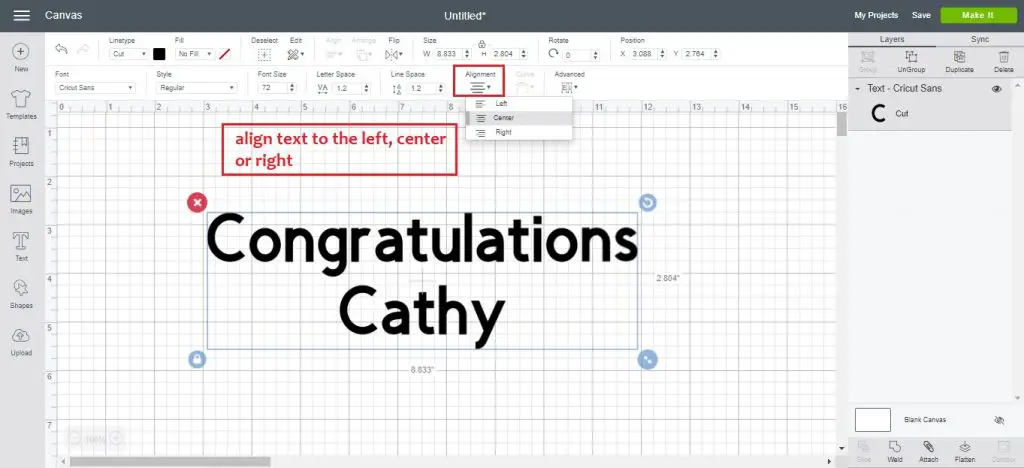
Changing The Text Alignment
You can change the alignment of your text. You can align left, center it, or align right.
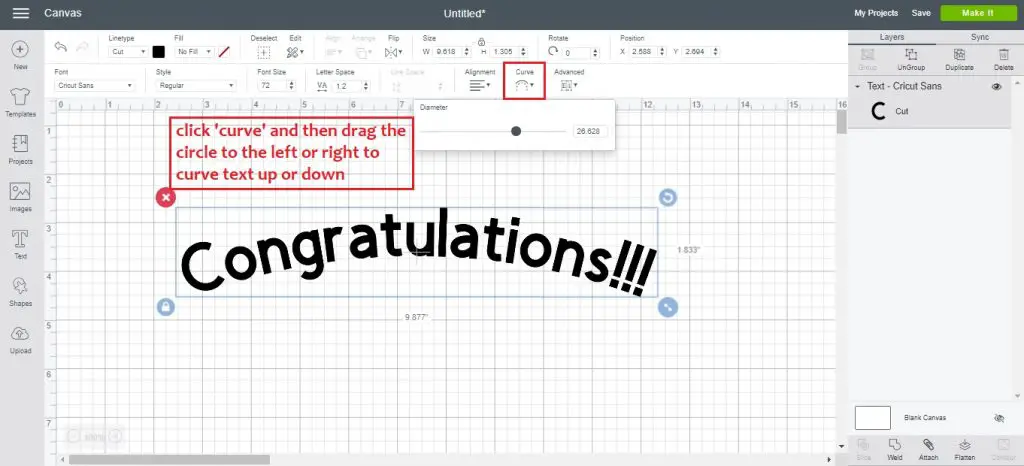
Curving Text
You can curve your text. Drag the button to the right or left to curve your text upwards or downwards. The further left or right you go, the more dramatic the curve. See our full tutorial on how to curve text in Cricut Design Space.
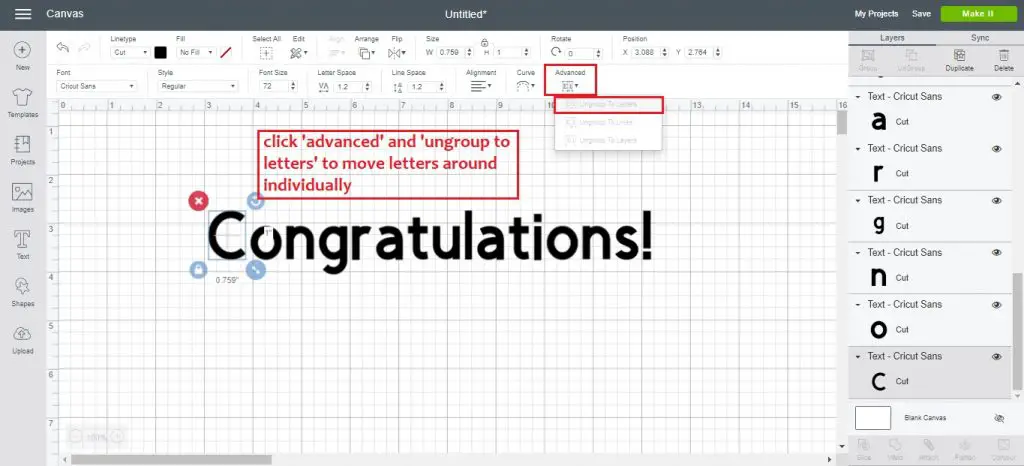
Ungrouping Text To Letters
Click 'advanced' and 'ungroup to letters' to separate the letters in the text. Now you can move each letter around individually and further customize your text.
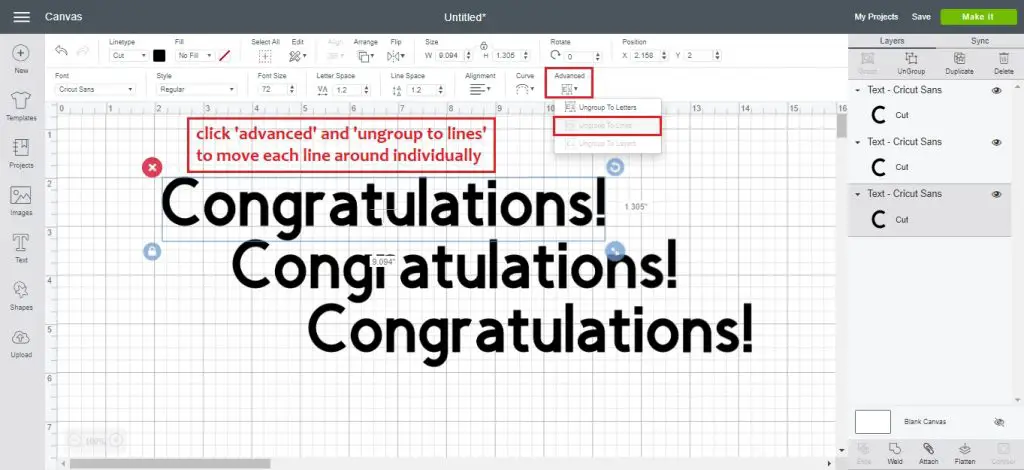
Ungrouping Text To Lines
Click 'advanced' and 'ungroup to lines' to be able to manipulate a single line of text. Now you can arrange multiple lines of text exactly how you'd like.
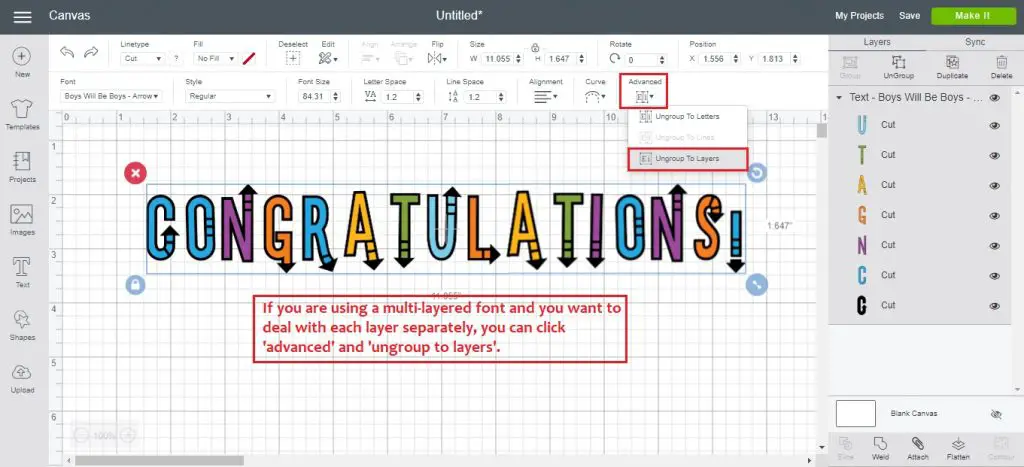
Ungrouping Text To Layers
If you are using a multi-layered font, you can click 'advanced' and 'ungroup to layers' to deal with the layers separately. After ungrouping to layers you can also further ungroup to letters.
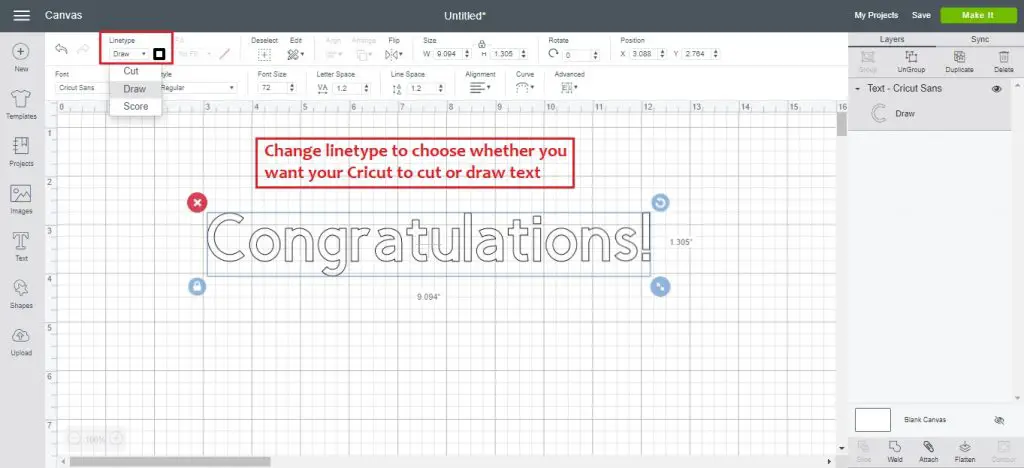
Changing The Linetype
Change the linetype to select whether you want your Cricut to cut or draw your text.
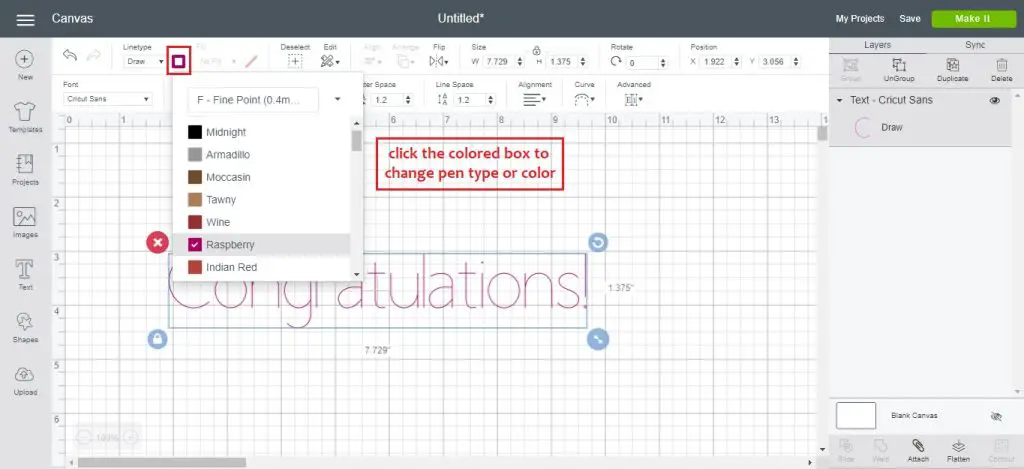
Changing Pen Type & Color
After selecting 'draw' as your linetype, you can click the box next to it and choose your pen type and color. If you select 'cut' as your linetype, you can choose your material color.
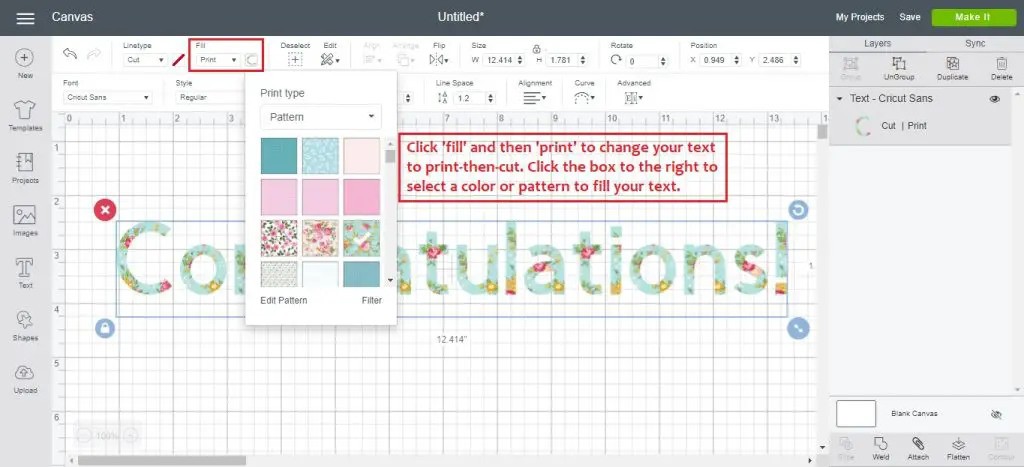
Color & Pattern Fill
If you would like to print and cut your text, choose 'cut' for linetype, and 'print' for fill. Click the box next to it to choose a color or pattern to fill in your text.
You will print this out with your printer, and then put that printed page into your Cricut for it to cut out around the text.
Learn more about how to use patterns in Cricut Design Space.
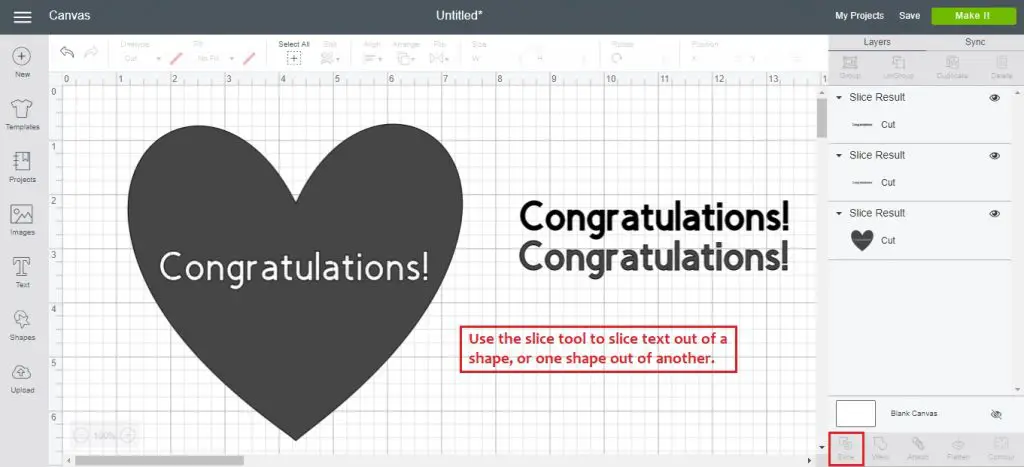
Slicing Text With Cricut
You can use the slice tool to slice text out of a shape, or to slice one shape out of another shape.
Position the text where you would like it be be sliced out, then select both layers and click slice in the bottom right corner. Move the layers to the side to see your new design.
Check out this full tutorial on how to use the slice tool in Design Space for more info.
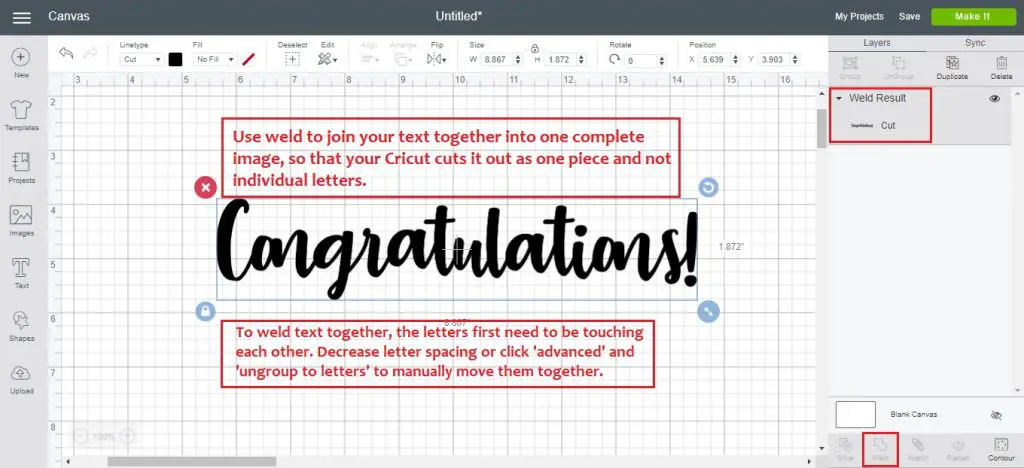
Welding Text
Use the weld feature in Design Space to join text together into one continuous image. Instead of cutting out separate, individual letters, your Cricut will cut out around the text as one word.
To use this feature successfully, the letters must all be touching each other, as you are sort of gluing them together in a way!
Decrease the letter spacing, or click 'advanced' and 'ungroup to letters' and manually move all the letters together so that there is no break between them. Then select all and click weld.
Learn more about how to use weld in Cricut Design Space.
Using Attach With Text
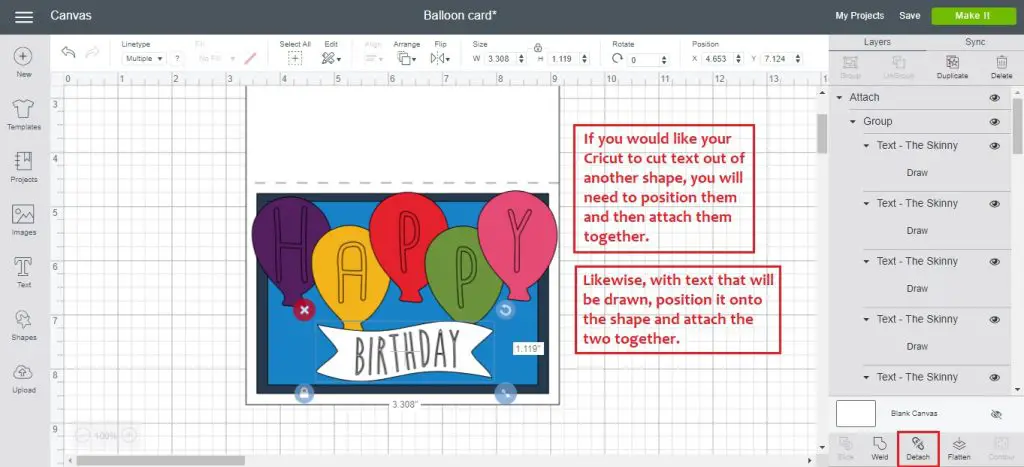
Use the attach feature in Design Space to attach text and shapes together. With this feature you can draw text onto another shape, or you can cut text out of another shape.
In the screenshot below I have made a birthday card.
I want the word 'birthday' to be drawn onto the banner with a pen, so I have attached those two elements together. I also want the letters to be cut out of the balloons, so I have attached each letter to a balloon. Now my Cricut knows exactly what I want it to do!
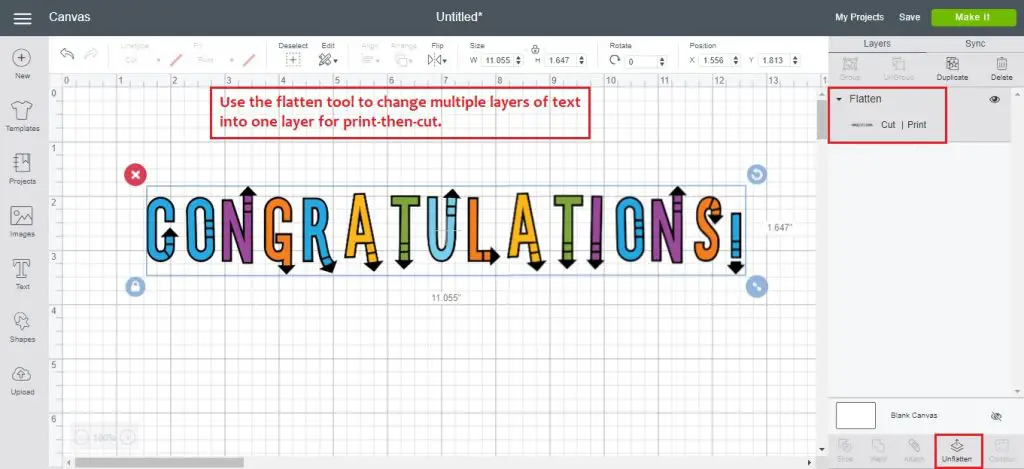
Using Flatten With Text
You can change multi-layered text fonts into a single-layered image with the flatten tool.
Select all and click 'flatten'. Now you can use your text for print-and-cut. Print out the image with your printer, and then place the printed page into your Cricut cutting machine, and it will cut out the letters.

Editing Text In Cricut
So that's how to edit text in Cricut Design Space – you're a master now!
Thanks for reading. Leave any questions or comments you have down below.
(Please note: This post contains affiliate links. Read our full disclosure policy here.)
How To Change Font In Cricut Design Space App
Source: https://www.howtoheatpress.com/how-to-edit-text-in-cricut-design-space/
Posted by: kruegerbittly.blogspot.com

0 Response to "How To Change Font In Cricut Design Space App"
Post a Comment